
Parts List:
- ATOTO A6 Double-DIN Android Car Navigation Stereo – A6Y2710SB – Amazon – ATOTO ($164.90)
- Metra Jeep Wrangler TJ Double-DIN Dash Kit – 95-6541 – Metra – Crutchfield ($99.99)
- Metra Jeep Wrangler TJ Wiring Harness – 70-6502 – Amazon – Metra – Crutchfield (14.99)
- Metra Jeep Wrangler TJ Antenna Adapter – 40-CR10 – Amazon – Metra – Crutchfield ($9.99)
- Crutchfield Master Sheet / Install Guide & Wiring Adapter Guide- 027 0017 & 120 70-6502- Crutchfield (Optional) ($9.99)
Before we get started I’d like to ask you for a favor. If you find this post useful please consider supporting this site by purchasing any of the items above through the links provided. The links to Amazon are affiliate links, and the small commission that I may earn keeps this site running so I can continue to provide helpful information.
My TJ is a 2004 model year.
Instructions
1. Connect Wiring Harness(es)
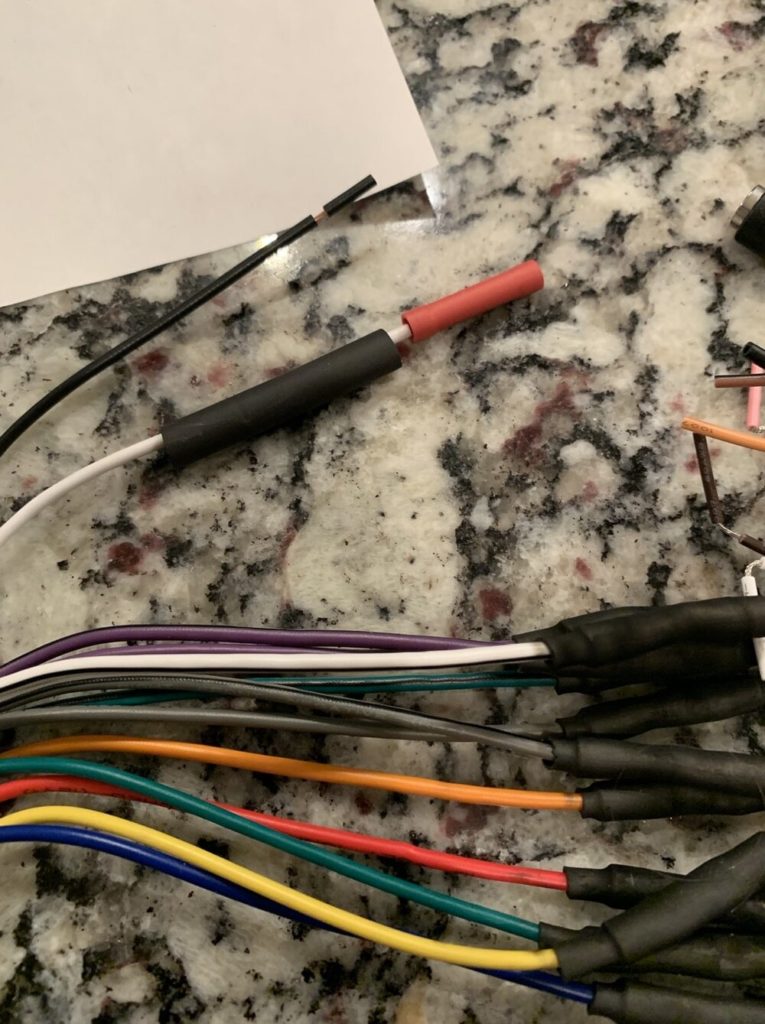
Connect the Atoto A6 wiring harness to the Meta Jeep TJ wiring harness. The colors on both harnesses match up almost 100%.
Use 22-18 gauge wire connectors/crimps. I also used 1/8 – 1/4” heat shrink tubing to protect the connectors in case they get wet. Simply match the wires below from the ATOTO harness to the Metra harness and connect them with a wire connector/crimp. Cut a piece of the heat shrink tubing long enough to cover the wire connection and a portion of the wires on either side of the connector. Put the heat shrink tubing on a wire first before attaching with a wire connector.
You may use some of the wires in the “Not Used” section such as the Rear Camera or Parking Brake depending on which accessories you install. These are the wires that I did not use on my install.

2. Remove Center Dash Bezel
Carefully remove the center dash bezel. If you have not removed it before you can easily find instructions online or you can purchase the Crutchfield MasterSheet which provides step by step instruction on how to remove the center dash bezel (link above in the parts list).
You also will need to re-use the existing air (heat and A/C) vents from the original dash. To remove both vents, gently push them from the inside of the bezel until they slide out. They are held in place by a grooved recess on both sides of each vent. Once they are removed, transfer both vents to the new Metra double-DIN dash by inserting and pushing them into place from the outside of the bezel.
TIP: When you pull the center dash bezel off pull it slowly so you do not damage the 4 retaining clips that keep it attached to the dash. Once the bezel is removed, pull the 4 clips off of the bezel and set them aside. You will reuse them when you install the new Metra double-DIN dash bezel.
3. Remove Radio
Remove the 4 screws that retain your existing radio. Detach it from the existing wiring harness and remove the antenna connector.
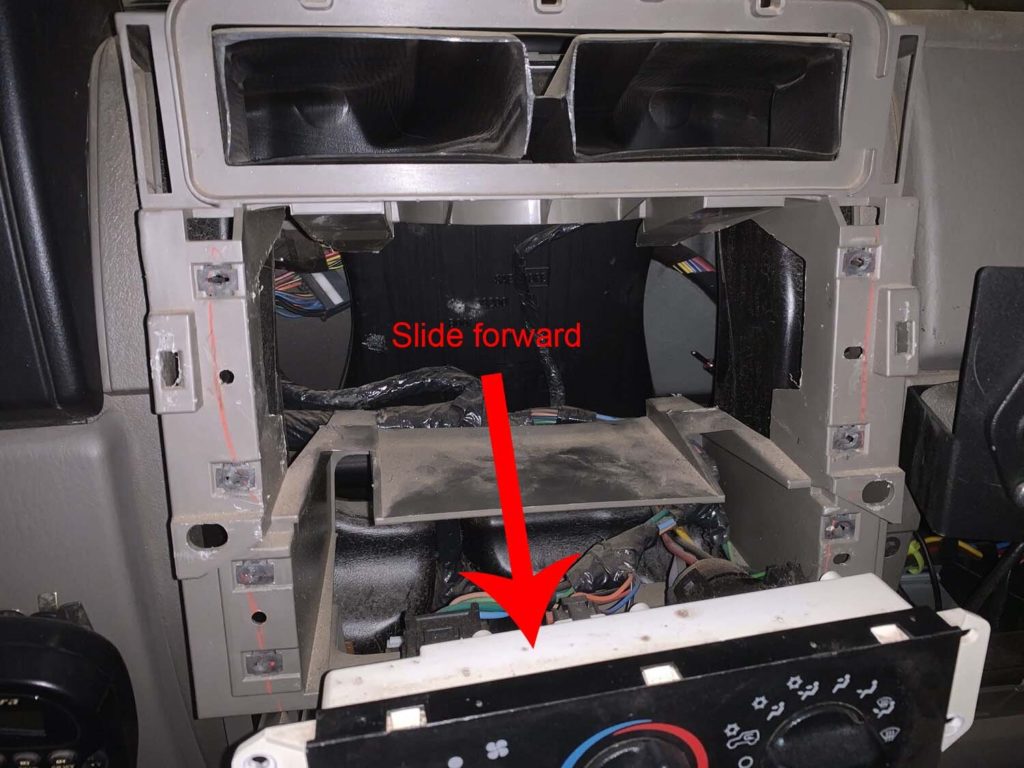
4. Detach the Heat and A/C Control Bezel
Remove the screws that retain the heat, A/C and fan controls. Gently pull the assembly forward. You want it to be as out-of-the-way as possible while trimming the dash pieces so the double-DIN stereo will fit.
I did not detach any of the plugs that attach to the controls on the bezel.
5. Test Fit the ATOTO A6 in the New Metra Double-DIN Dash Bezel
Make sure the ATOTO unit fits snugly in the new Metra double-DIN dash bezel and check that there are no gaps between the outer edge of the ATOTO unit and the dash bezel. It fits very well, so you should not have any issues.
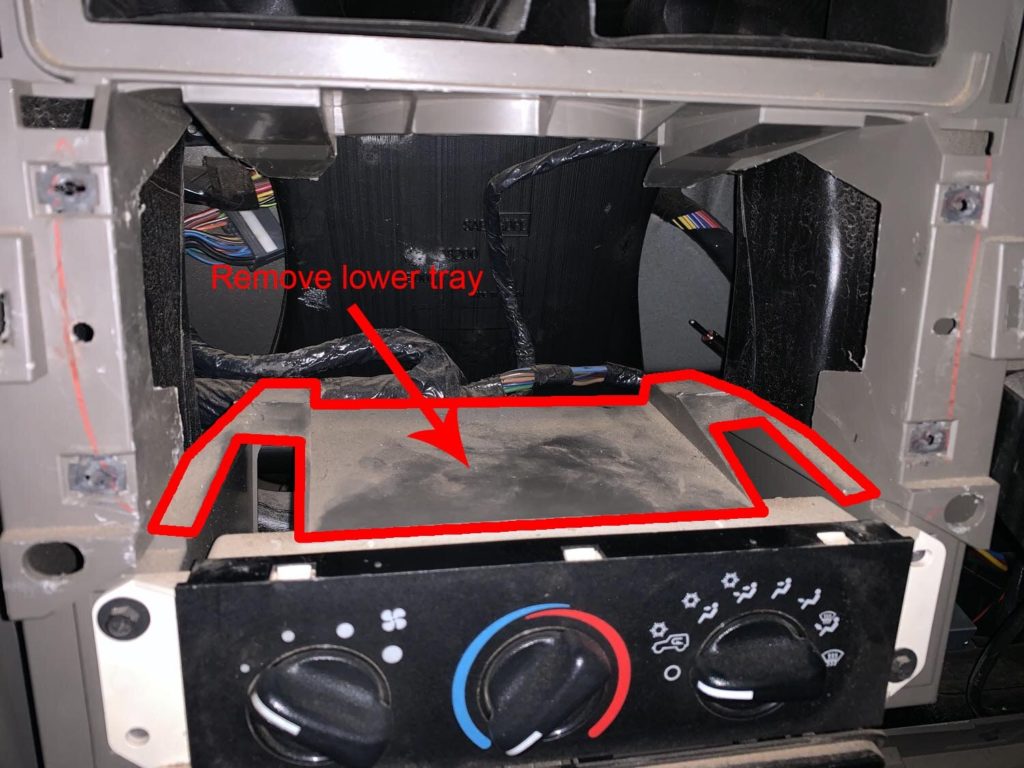
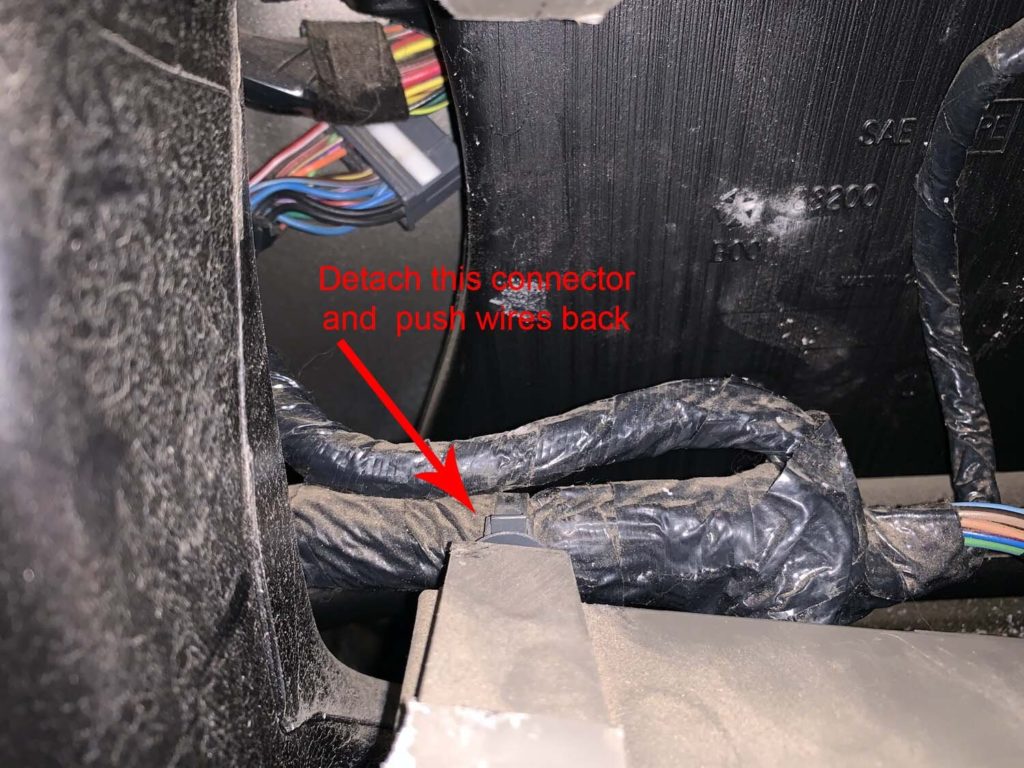
6. Remove the Lower Tray / Support
You will need to remove the plastic lower tray to make room for the ATOTO unit.
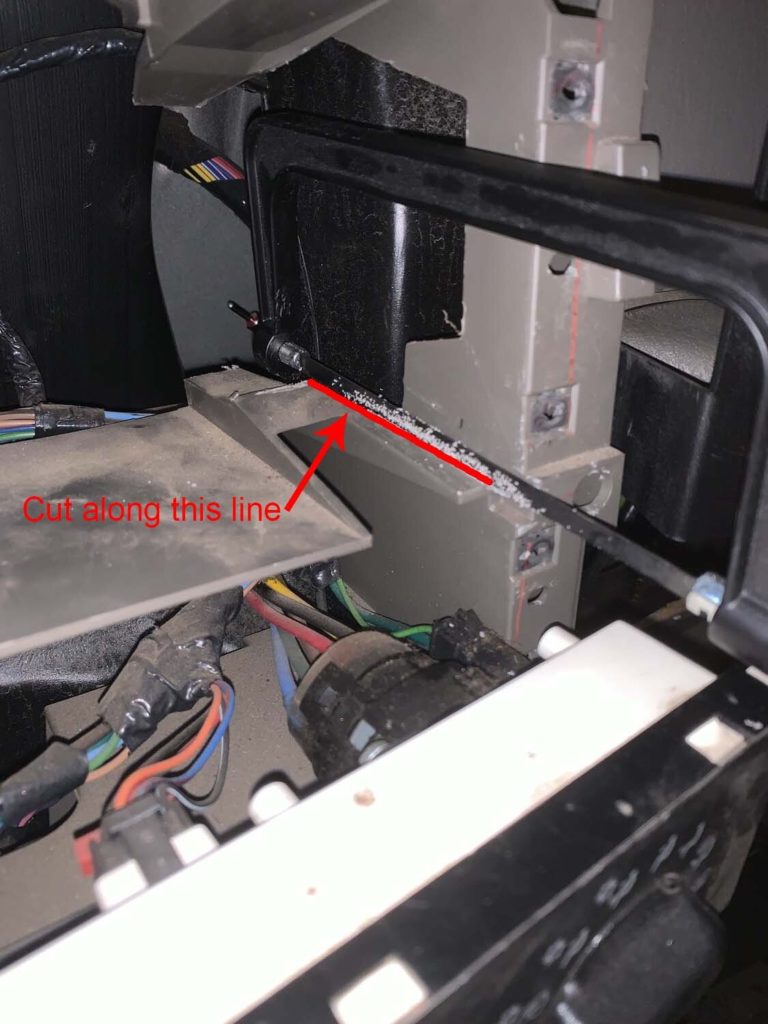
Start by pushing the wires that are towards the rear of the dash as out-of-the way as you can. Take your time while cutting the plastic and be EXTRA CAREFUL to not cut or nick any of these wires.
Start by cutting the right side first. I used a small hack saw instead of a powered device so I could go slowly and make sure I didn’t hit or cut any of the dash wires. Cut the “top” or “flat” part first as shown in the photo below.
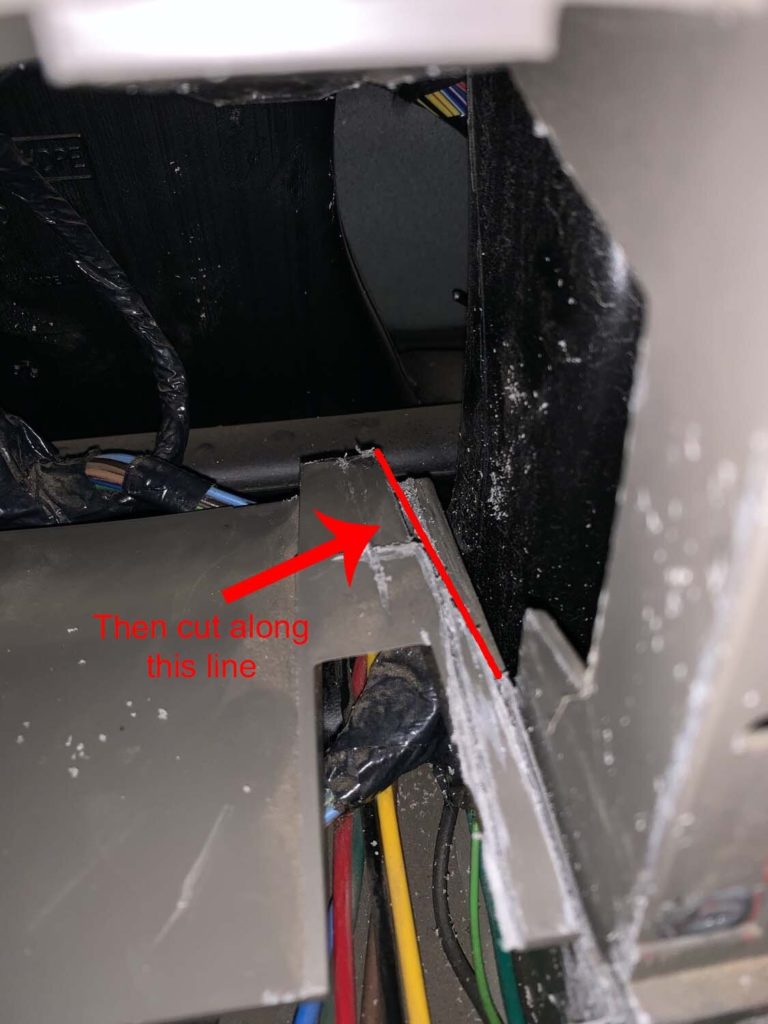
Once the top/flat piece is cut, then cut at an angle to remove the remaining piece of the tray.
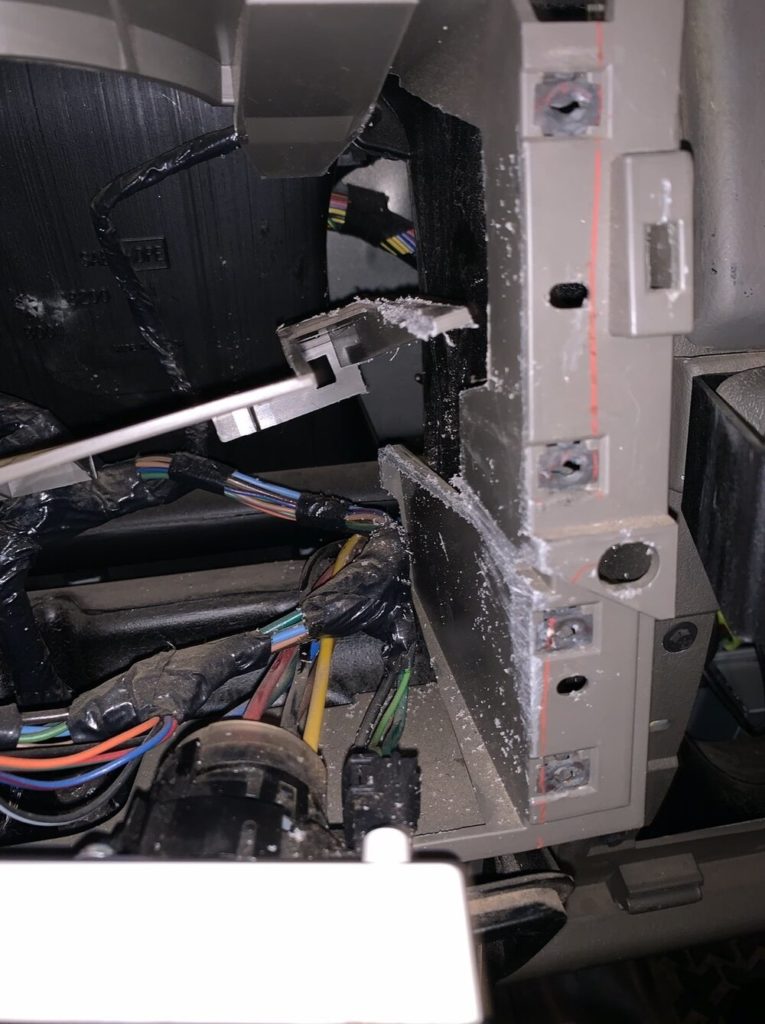
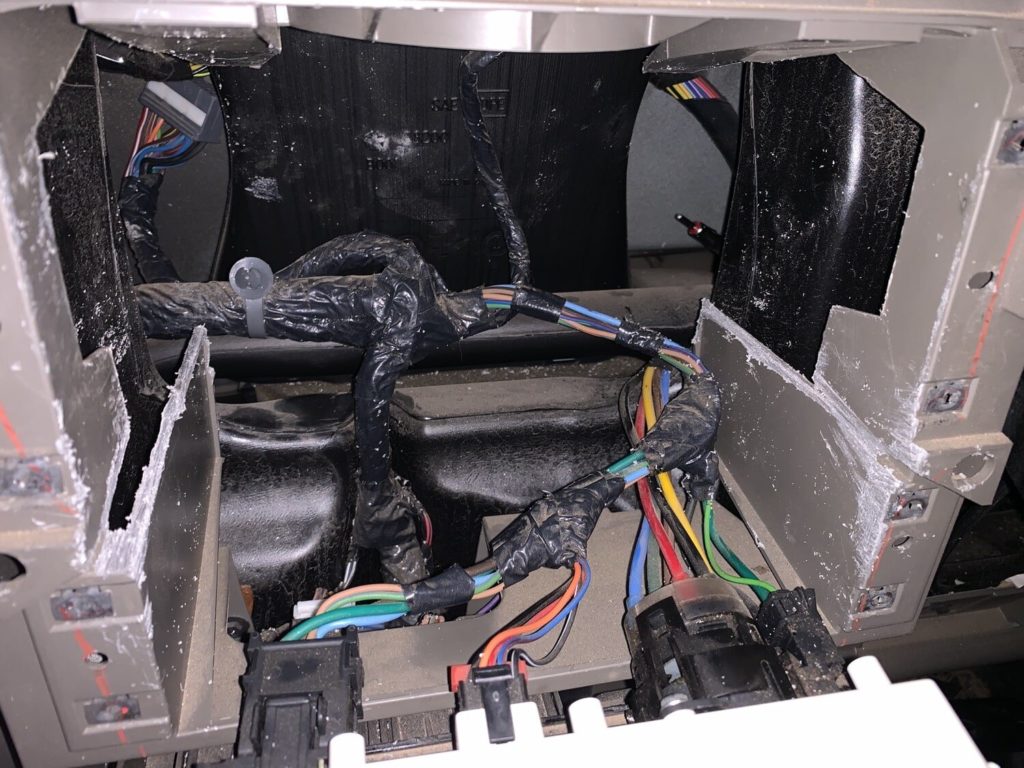
These photos give you another view of the angles to cut and what it looks like once the cuts are complete:
Repeat the process on the left side of the lower tray. Notes that one of the wiring harnesses attaches to the back of the tray on the left side. Disconnect the plastic retaining clip and push the harness as far out of the way as you can.
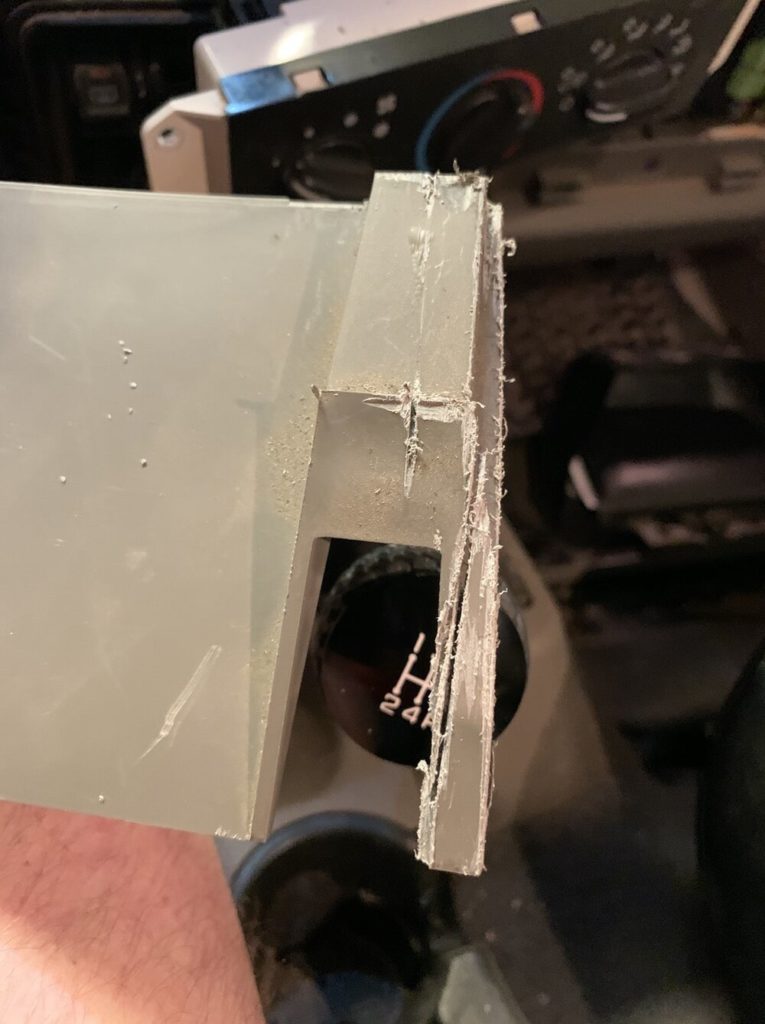
Depending on your cuts, you may need to do some final trimming once the lower tray is removed. Note the areas in the photo below that are not completely cut.
Once both sides are cut, remove the tray and it will look like this:
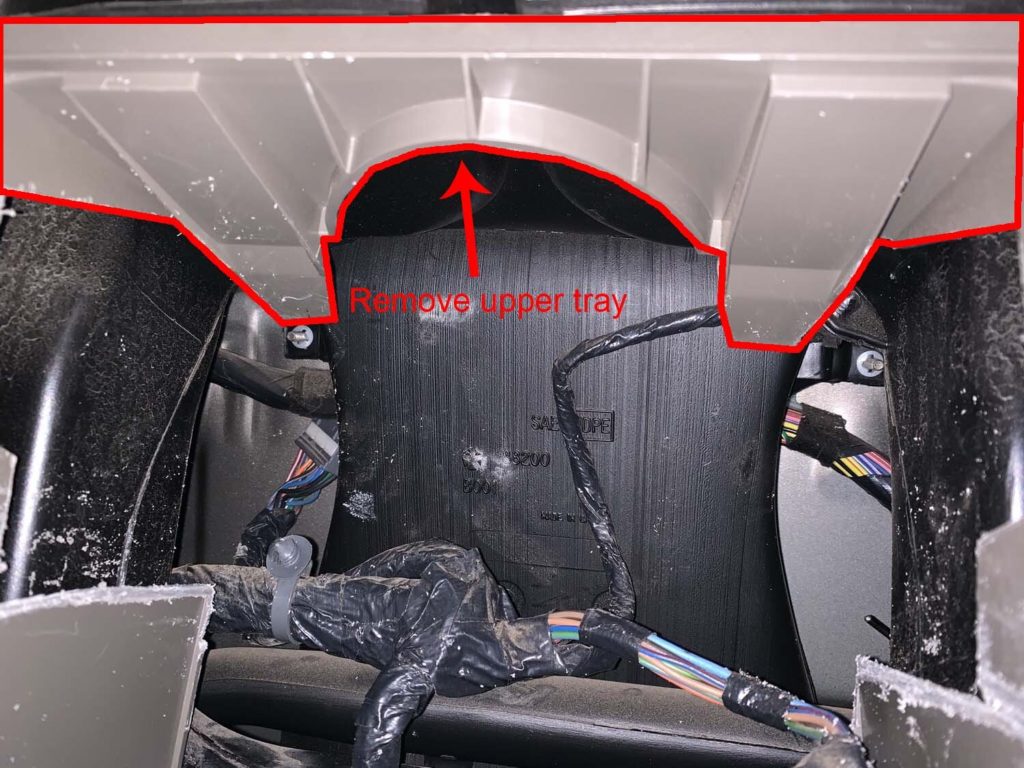
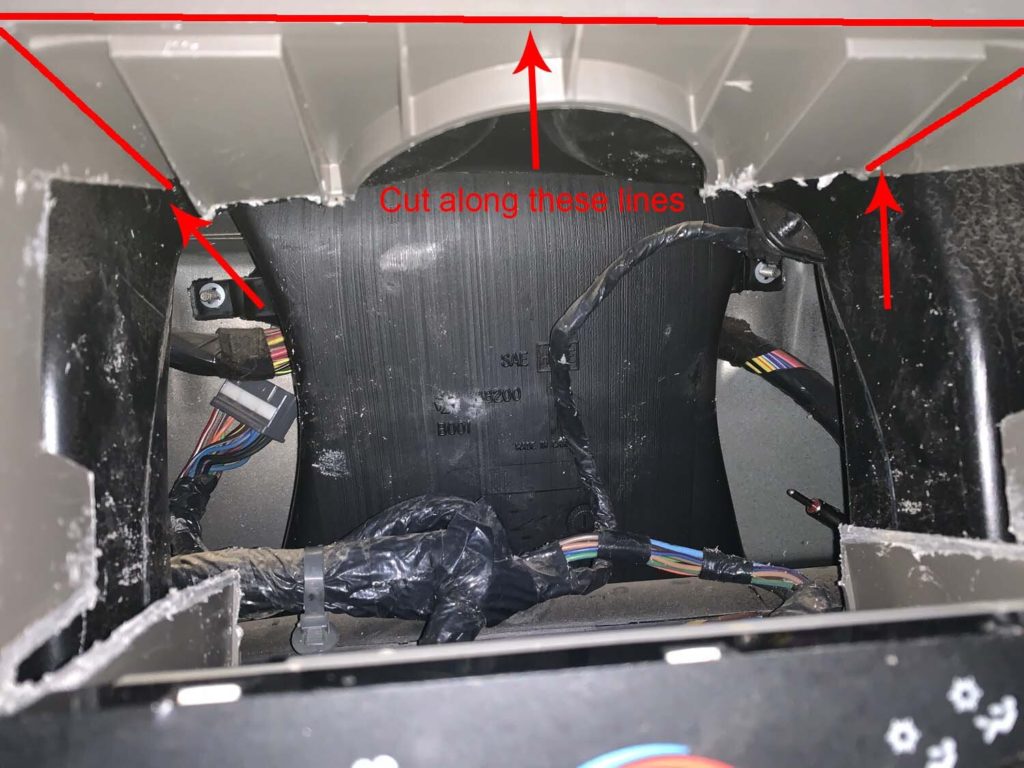
7. Remove Upper Plastic Support
My TJ is a 2004 and it also had a plastic piece above the radio that appears to have helped stabilized the factory stereo unit. I attempted to test fit the ATOTO unit without removing this piece, but it would not fit properly as the two tabs towards the rear of the piece pushed the ATOTO stereo down and the mounting holes would not line up properly.
I used a Dremel tool with a cut-off attachment to first remove the two tabs to see if that was enough (it wasn’t, read on):
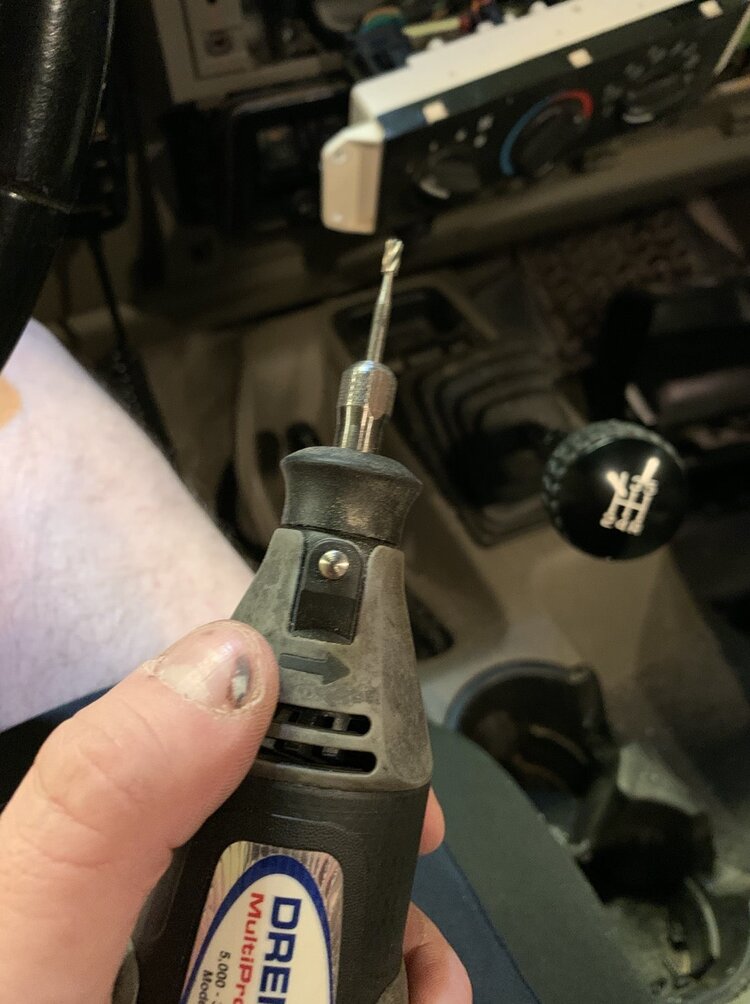
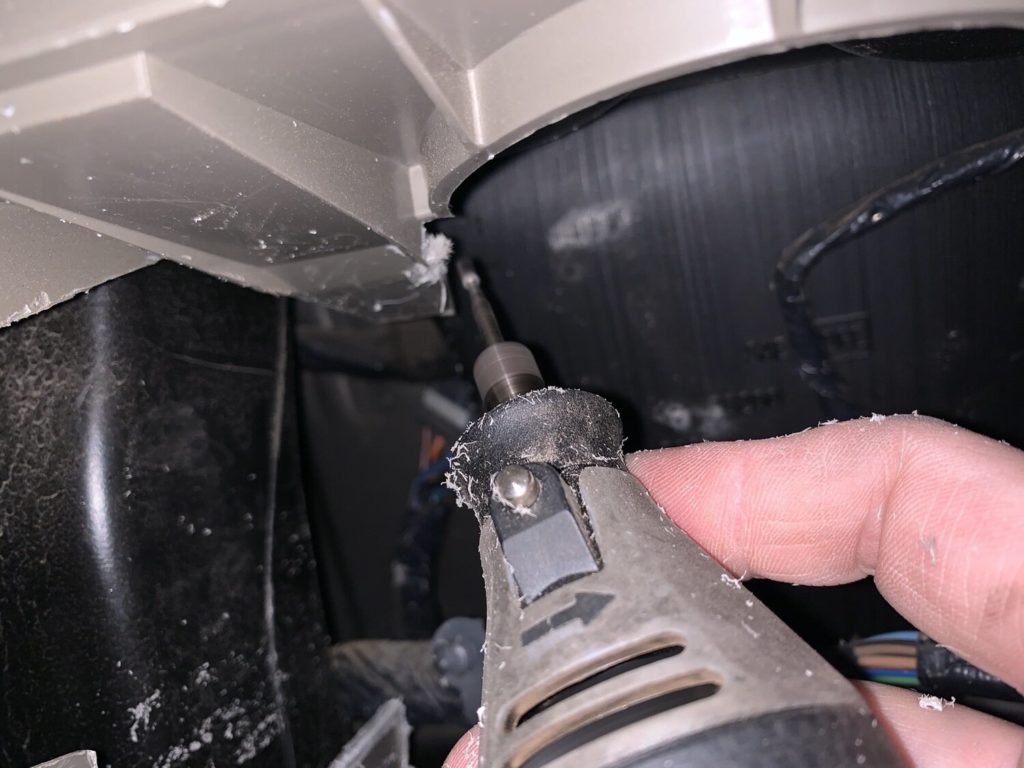
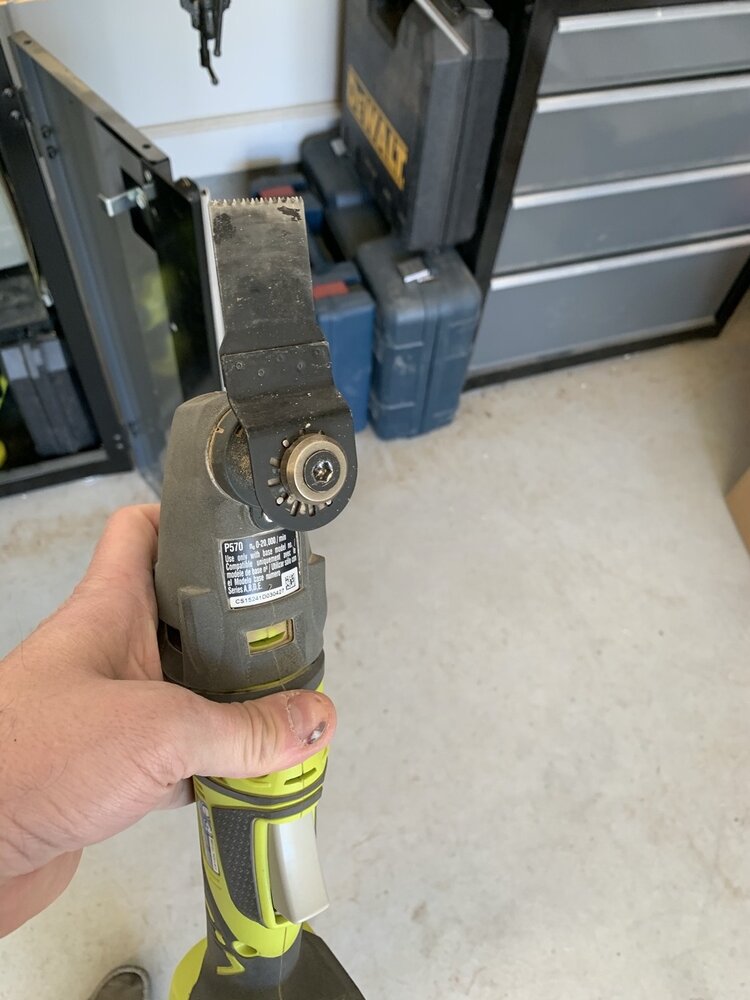
After the two tabs were cut off, I switched to a Ryobi rotary tool with a cutting blade to make the remaining cuts:
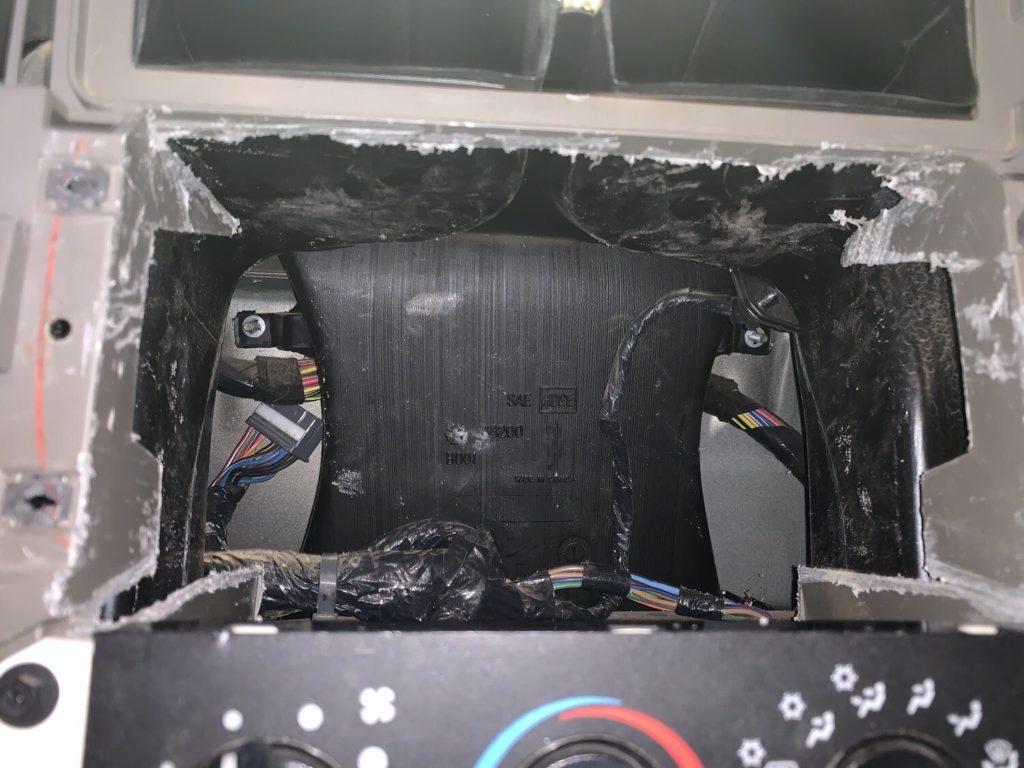
And it should look similar to this once the top piece is removed:
8. Attach Mounting Brackets to ATOTO Unit
The Metra double-DIN dash kit comes with the required 2 mounting brackets for a double-DIN size stereo. I tried probably 10 different bracket and screw placements before I found the combination that allowed the ATOTO unit to fit just right in the dash and line up with the new dash bezel.
Here is the final bracket and screw placement that I used:
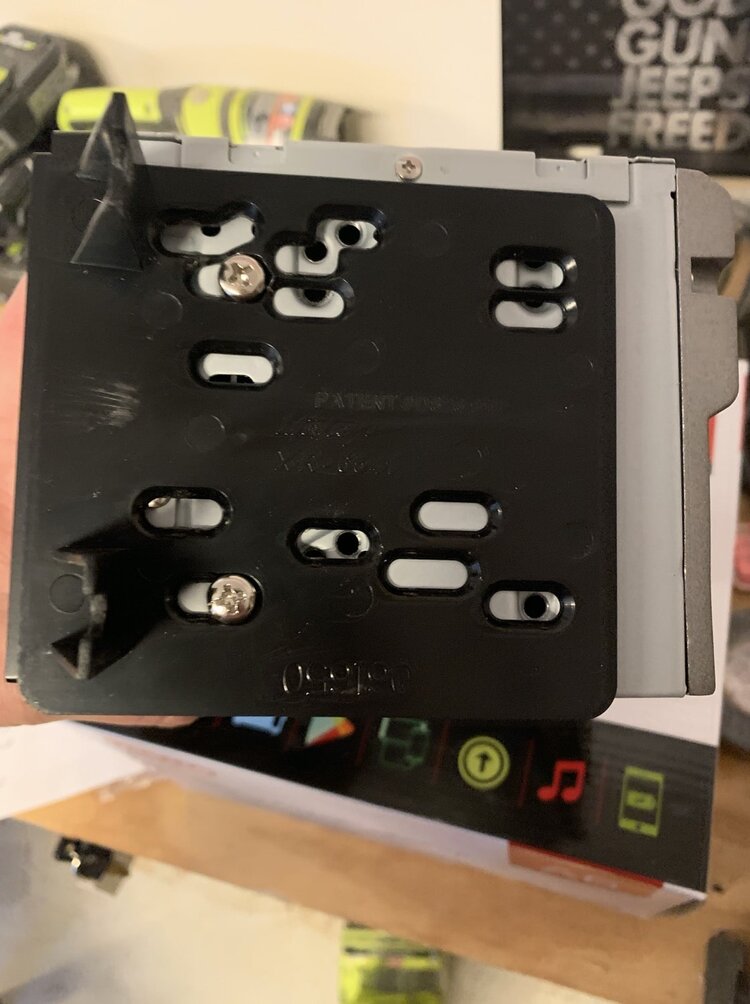
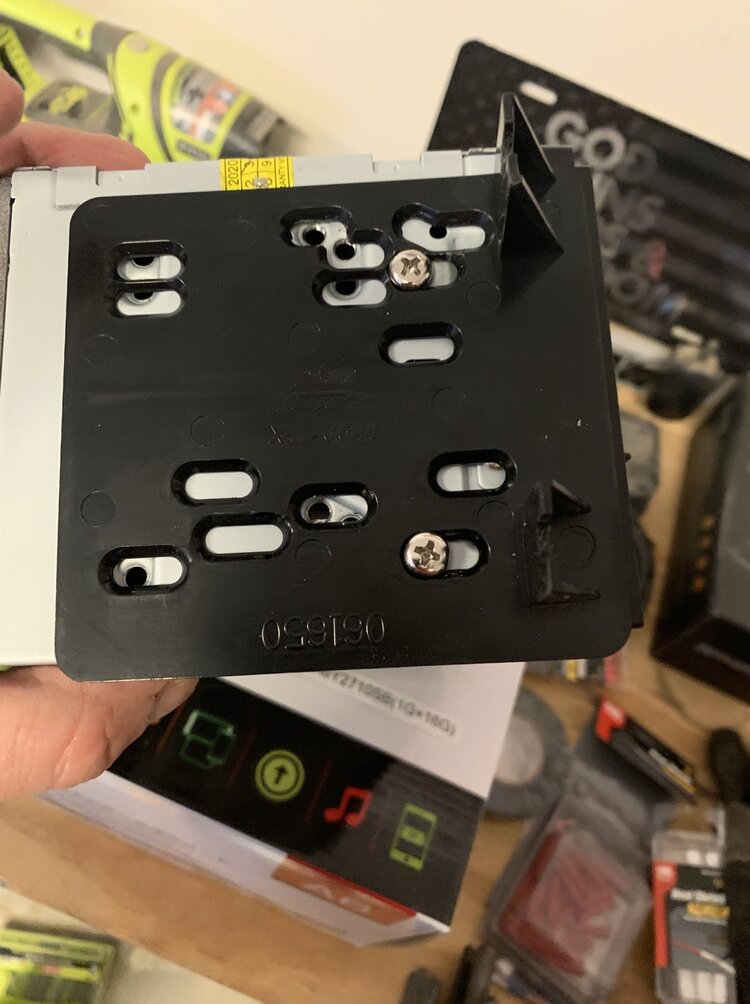
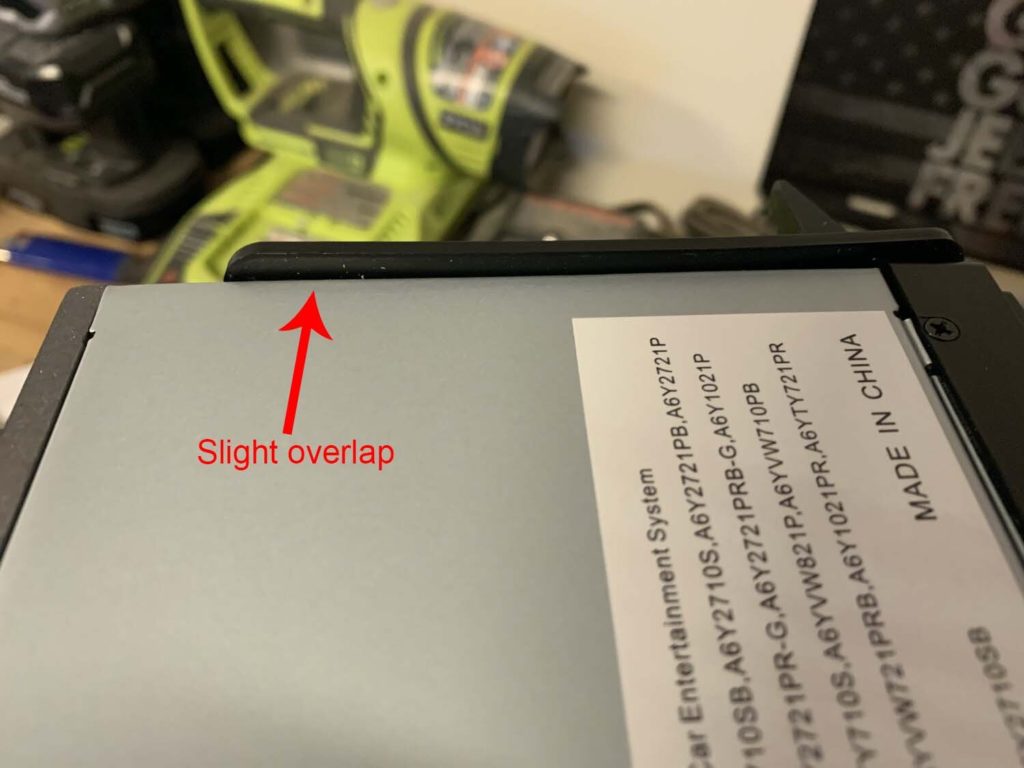
Note that the mounting brackets will extend slightly below the bottom of the ATOTO unit. The brackets also rest on top of 2 screws on each side of the unit.

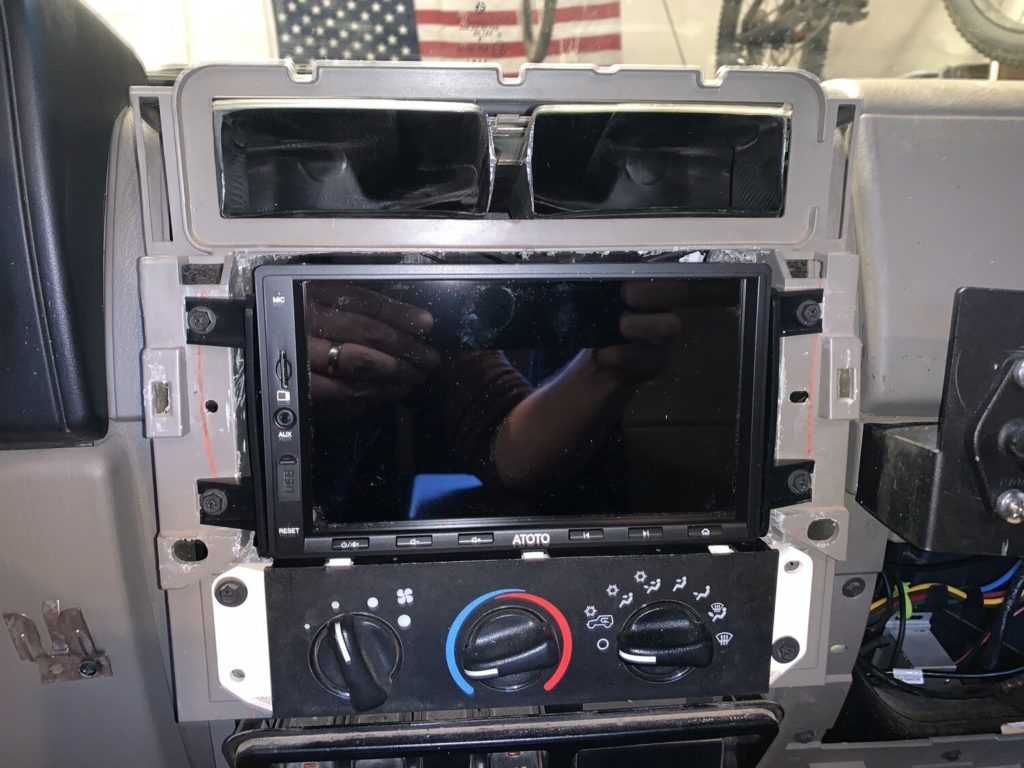
9. Test Fit the ATOTO Unit and the Metra Double-DIN Dash Bezel
Before you plug in all of the wires and connections, place the ATOTO unit into the dash and secure it with the mounting screws. Make sure that it fits nice and easy with no resistance — you should be able to slide it in with one hand and line up the mounting brackets with their screws. If you are not able to then you most likely need to do some more trimming of the plastic pieces.
You may need to position the screw holes on each side of the Metra mounting brackets one at a time. For example, attach the upper left screw first, then do the same for the others until all 4 screws are lined up and tightened.
TIP: Do not attach the retaining clips that you removed from the original dash bezel to the new Metra dash bezel yet. This makes it easier to slide the center bezel on and off if you need to make fit adjustments.
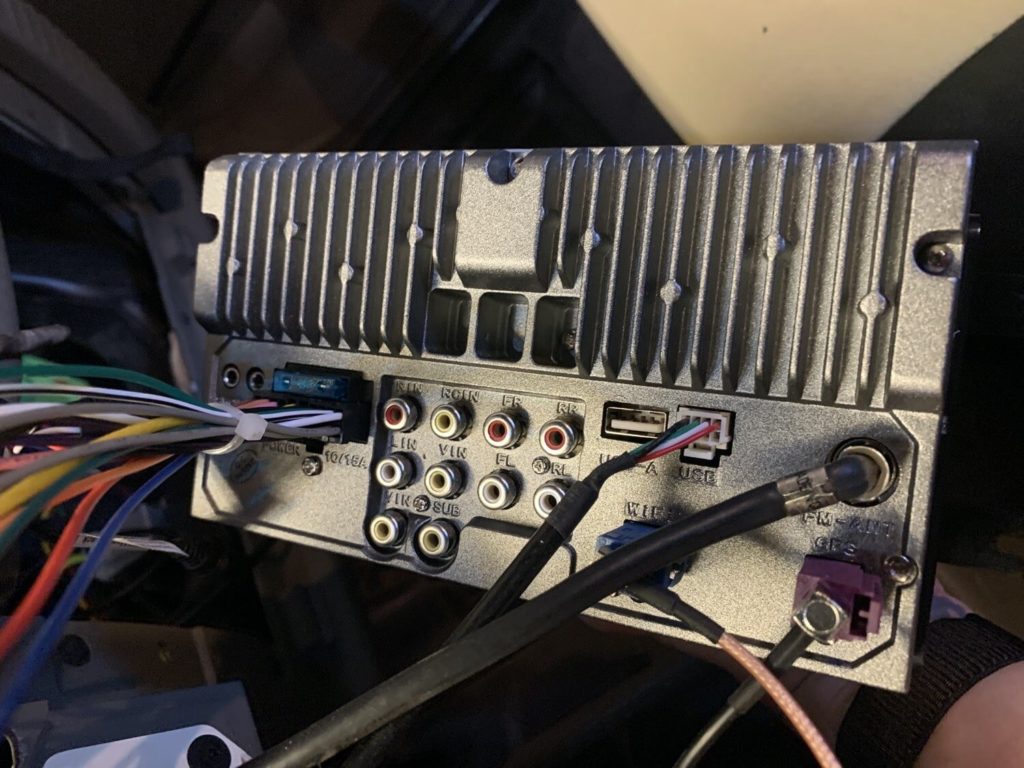
10. Connect All Wiring and the Antenna
After you have test fit the ATOTO unit, remove it and connect all of the wiring and the Metra antenna adapter. You will have connections for the ATOTO wiring harness, the USB input cable, GPS antenna and Wifi antenna.
11. Run Wires for the GPS and WiFi Antennas
I placed the GPS and Wifi antennas on the windshield right above the the top dash trim piece. This keeps them out of the way, but also provides good reception. I cleaned the area on the windshield where I attached them with an alcohol wipe pad first.
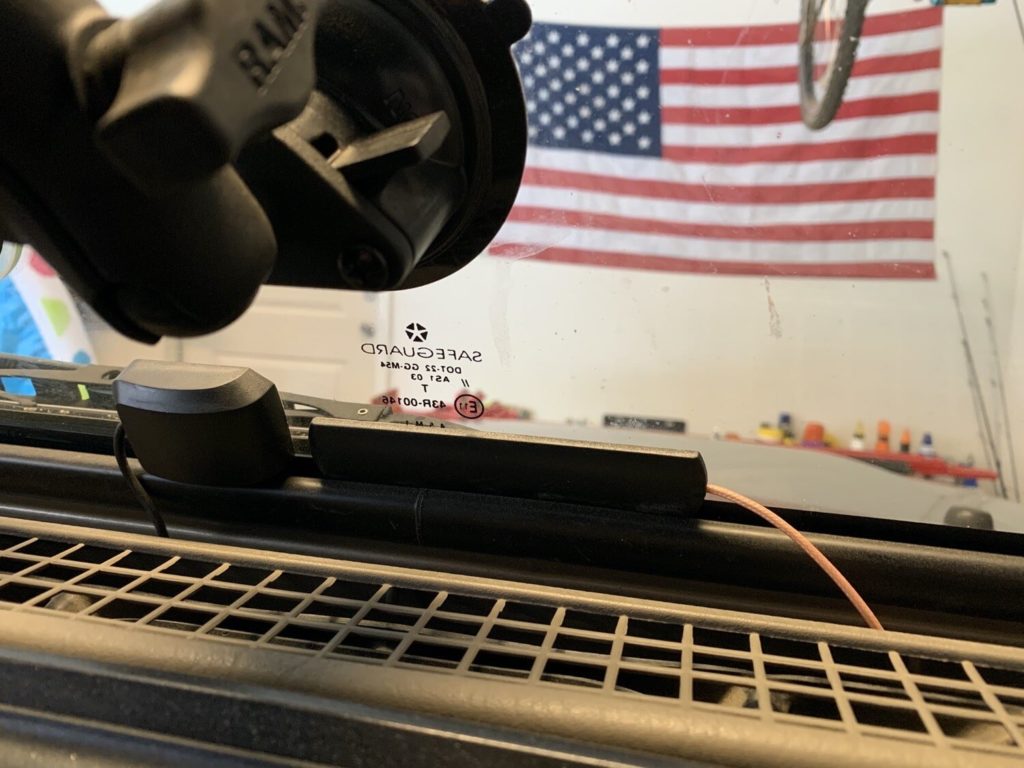
I have also heard of others installing these two antennas on the heat/air vents that are right under the center dash bezel if you prefer to have them hidden from sight.
12. Re-Install the ATOTO Unit and the Metra Dash Bezel
Reinstall the ATOTO unit once all wires are connected. Attach the dash retaining clips to the new Metra double-DIN center dash bezel and re-install all of the dash trim screws.
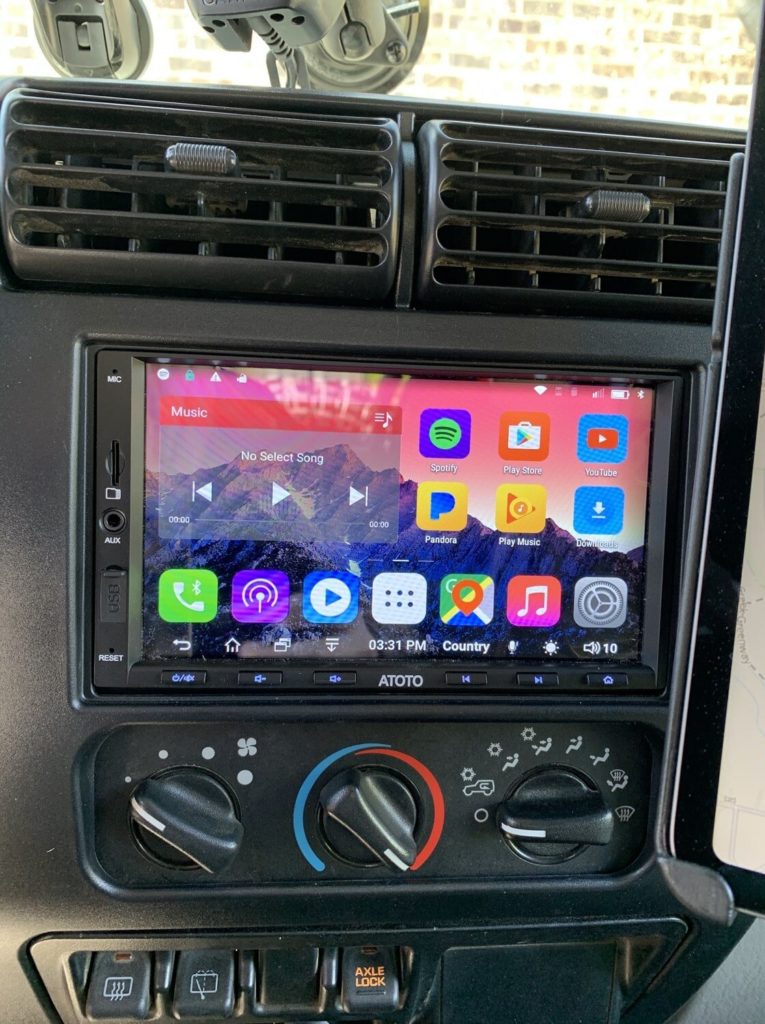
And you are done! The photo at the top of the post shows the completed installation.

6 Comments
Vince
January 21, 2022 at 1:34 pmNice post but you failed to mention the year TJ you installed in, and there’s no finished product picture(s).
Colby
January 21, 2022 at 4:23 pmHi Vince – thanks for the comment and good points. My TJ is a 2004 model. The photo at the top of the post shows the completed installation after the new bezel was installed. I have updated the post with both of these items as well.
Chrissie
October 18, 2022 at 8:39 pmExcited to give this a try! How do you feel about the small(ish) buttons for the volume? I never would have thought of it as a problem, but another installer said it distracts them a little from driving, not being able to easily adjust the volume with a knob.
Colby
November 1, 2022 at 4:40 pmThe smaller buttons never really bothered me. The radio is closer enough to the driver where they were easy press. Thanks for the comment!
Denis
July 18, 2023 at 11:22 pmHi,
Did you have a factory sub that came with your Jeep? If so, did it work after the install? For some reason after the install it stopped working. Let me know if got it worked.
Colby
July 20, 2023 at 7:40 pmHi Denis,
I did have the factory sub, but I did not have an issue with it working after the install. I would check the wiring harness first, the blue wire on the ATOTO harness should be connected to the Blue/White wire on the Metra harness. The instructions label those wires as the amp turn on positive wire, but they should turn on the sub as well. If those are connected I would remove the sub from the center console and use a multi-meter to make sure the sub is getting 12V power when the head unit is on.
Send me an e-mail directly through the contact form and I have some docs I can share with you that might help as well.